It’s also super easy to upgrade to a paid account, and you won’t lose any of your previously saved designs or uploaded media in the process.
Step 1: Creating a Free Account
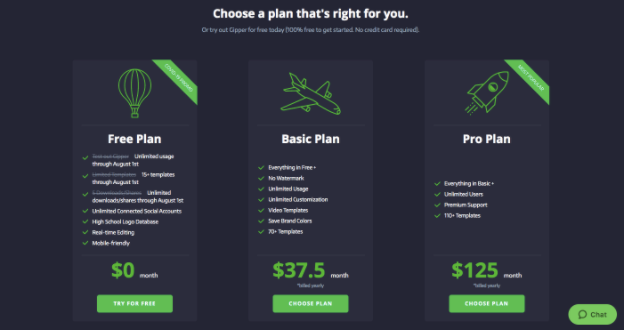
When launching Gipper for the first time, users are given three different plans to choose from. If you just want to try out Gipper and see if it is right for your program, the free plan is a great way to get started. The plan page is shown below:
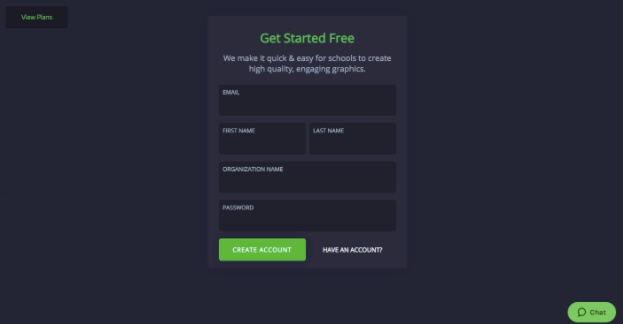
Once you select on the free plan, all you have to enter is your email, name, organization name, and a password. Shown below:
Trying out the paid plan is a great way to get a feel for the platform and see if it is something you would like to purchase for your school.
Step 2: Upgrading to a Paid Plan
If you decide that you'd like to move forward and use Gipper, it's super easy to upgrade your account. Best part? When you do, you'll keep all of your stored media, saved designs and linked social accounts! All you have to do to upgrade is click the green box in the top right corner of the platform.

Once you click on that, you will be asked to select between the basic and pro plan. After choosing, all you have to do is enter your credit card information and you can complete the order and get back to using Gipper!
Wrap Up
Creating a free account is a smart and easy way to get familiar with the Gipper platform before you decide to purchase. It gives you the ability to upload media and experiment by creating and saving customized designs. And, if you enjoy the platform and would like access to all our templates and other premium features, it is super easy to upgrade. You even get the added bonus of keeping all your previously saved media and designs!
I hope this was helpful and thanks for reading!
- Jake
Jake Engelberg is a blog writer at Gipper. Gipper is a platform that helps high school athletic departments create professional sports graphics for social media - in seconds, on any device, and without needing any design experience.
Learn more @ gogipper.com/athletics
OTHER RESOURCES YOU MIGHT LIKE







.png)